Makeup for photoshoots isn’t about piling on products it’s about how makeup looks under lighting and camera lenses. For dark skin tones, the focus should be on enhancing natural richness, avoiding ashy tones, and making sure facial features remain defined and balanced in photos.
Proper skin preparation
A smooth base helps makeup sit better and last longer under studio or outdoor lighting.
- Cleanse the skin to remove excess oil and buildup
- Apply a light moisturizer for hydration without greasiness
- Use a primer to refine texture and improve makeup grip
- Keep skin well-hydrated, especially under the eyes and on dry areas
Good prep reduces the need for heavy makeup layers that may look cakey on camera.
Selecting the right foundation
Choosing the correct shade and undertone is essential for dark skin in photography.
- Warm undertones suit golden or reddish base foundations
- Cool undertones should avoid overly yellow shades
- Neutral undertones work best with balanced, true-to-skin tones
Avoid foundations that are too light or grey-toned, as they can create an uneven or ashy appearance in photos, especially with flash.
Strategic concealer use
Instead of heavy coverage, focus on targeted brightening.
- Lightly under the eyes for a refreshed look
- Center of the face (forehead, nose bridge, chin) for subtle highlight
- Blend well to avoid harsh contrasts
Less product usually gives a more natural, camera-friendly finish.
Setting the makeup correctly
Powder helps control shine, but too much can dull the skin’s natural glow.
- Use light, finely-milled powders
- Concentrate on oily areas like the T-zone
- Avoid over-powdering cheeks and outer face
- Press powder gently instead of sweeping it heavily
This keeps skin looking smooth without flattening its natural tone.
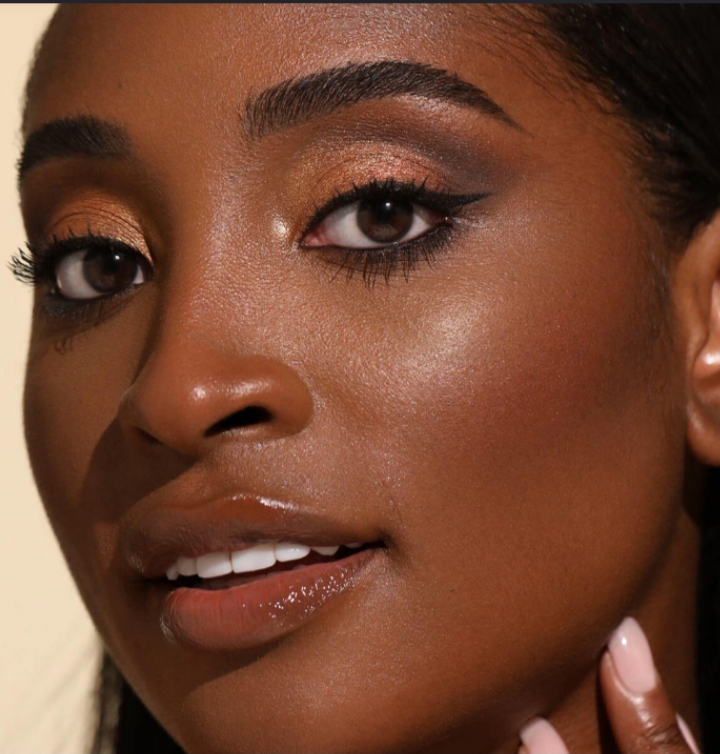
Contouring and bronzing for depth
Lighting can reduce facial definition, so soft sculpting is helpful.
- Use rich brown or warm contour shades instead of grey tones
- Apply lightly to cheekbones, jawline, and temples
- Add bronzer for warmth and dimension
Blending is important to avoid harsh lines that show in photos.
Highlighting for a natural glow
Highlight should enhance features without overpowering them.
- Gold, bronze, or copper tones suit dark skin best
- Avoid icy or silver highlighters
- Apply lightly to high points like cheekbones and nose bridge
- Keep it subtle for a natural sheen
Eye makeup that stands out
Eyes should be defined so they don’t fade under strong lighting.
- Use warm neutrals, deep browns, or rich jewel tones
- Lightly define the lash line for structure
- Apply mascara or soft lashes for added depth
- Fill brows to frame the face without making them too harsh
Lip shades that complement deeper skin tones
Well-chosen lip colors can elevate the entire look.
- Warm nudes like caramel, mocha, or terracotta
- Bold shades such as berry, plum, or deep red
- Glossy or satin finishes for dimension
- Avoid pale or overly light nudes that can wash out the lips
Adapting to different lighting
Lighting has a big impact on how makeup appears on camera.
- Studio lighting may require slightly stronger definition
- Natural light works best with softer blending
- Flash photography should avoid products that cause flashback, such as high-SPF formulas
Testing makeup under similar lighting is always helpful.
Final touches for longevity
To keep makeup intact during a shoot:
- Use setting spray to lock everything in place
- Carry blotting paper for oil control
- Avoid layering too many products to prevent creasing
Conclusion
Makeup for photoshoots on dark skin is about balance, tone matching, and enhancing natural features rather than masking them. With the right shades and techniques, you can achieve a clean, radiant, and camera-ready look that photographs beautifully in any setting.